Showing posts with label Ancients. Show all posts

Monday, July 7, 2025

The Final Battles

The last two battles using 36 Ancient Battles for Dominion of the Spear

These battles feature Mongols.

Summary
Here are the results for the battles. Battle reports below.
  • Ain Jalut (1260) - Mamluks 3, Ilkhanids 1
  • Kulikovo (1380) - Muscovites 3, Golden Horde 1

Battle Reports

Ain Jalut
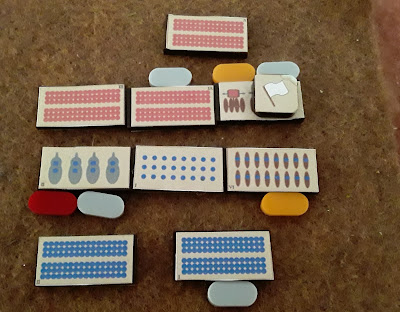
While the horse archers on the right cancel each other out, the center Mamluks (blue) rout their opponent.

Then the Bedouins (left) rout the Ilkhanid cavalry for the victory.

Oops, the Ilkhanid cavalry was supposed to be armored. Oh well, guess they forgot to put it on.

Kulikovo
Both sides suffered losses, then the Muscovite nobles (red) launched an attack on the left. They routed some horse archers but then get routed in return.

Some more losses, then the Muscovite infantry slaughters the Mongol horde.

NEXT UP
Hurray! I finished all 36 battles! I'm not doing that for the other books.

Others have mentioned and I agree that Dominion of really shines with campaigns. I'm trying to decide what campaign to do. 

As I mentioned, I'm leaning towards 1683 - Austrians (and Germans and Poles) vs. Turks. However, I may revive a campaign from my old blog - Hans Neiman and 1666. This campaign, inspired by the Silver Bayonet and Pikeman's Lament, featured a young Austrian officer contending against hordes of monsters. I have some ideas on how to convert it to Dominion of.

And I will also use Dominion of for some Revolutionary War battles.

Saturday, June 28, 2025

Duels in the Desert

More Battles Using 36 Ancient Battles for Dominion of the Spear

Taking a break from baseball for some more Dominion battles. Now we turn our sights on Crusades.

Summary
Here are the results for the battles. Battle reports below.
  • Dorylaeum (1097) - Turks , Crusaders 1
  • Hattin (1187) - Crusaders 2, Saladin 1
  • Arsuf (1191) - Richard the Lionheart 2, Saladin 1
  • Kosovo (1389) - Turks 5, Serbians 1
Battle Reports

Dorylaeum
The Crusaders (red) lose their knights and then spears in the center. This allows the Turkish horse archers to flank and rout the right wing spears.

Hattin
While Saladin's horse archers whittle down the Crusaders, King Guy's knights run roughshod, routing some spears and the Mamluk horse archers. Saladin tries to shoot down the Crusader spears, but they get in grips and rout the remaining horse archers.

Arsuf
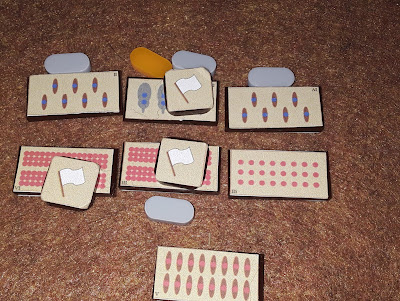
Both sides have lost two units. Now, Richard's Hospitalers (red left) face Saladin's Mamluks.

The Hospitalers send the Mamluks packing then slam into the flank of Saladin's archers.

Kosovo
OK, not desert. But still in the Crusader-ish theme.

A disaster for the Serbs early on. They lose their knights.

Then the Janissaries flank the Serb's horse archers, routing them. 

Saturday, June 14, 2025

Pyrrhus's Macedonian Wars

I'm continuing Pyrrhus's adventures, this time in Macedon. This campaign is purely fictional, following upon Pyrrhus's defeats in previous campaigns in Italy and Sicily.

Fearful of having Pyrrhus as a close neighbor, Antigonus Gonatas, king of Macedonia, tries to eliminate the Epirote king on the high seas. This merely provokes Pyrrhus. Upon landing in Epirus, Pyrrhus gathers his army and marches into Macedonia.

Battle of Lugios
Antigonus confronts Pyrrhus's invading army near the little (fictional) village of Lugios.
The opposing armies:
  • Antigonus (blue) - Archers, pikes, and elite cavalry in the front line, lots of spears in reserve.
  • Pyrrhus (red) - Ferocious armored elephants, archers, and elite cavalry in front, spears and armored pikes in reserve.

Pyrrhus unleashes his elephants (left), but the archers pepper the beasts with arrows. The elephants rout. Meanwhile, Pyrrhus's archers are not so accurate. The Macedonian pikes advance through the hail of arrows and cut down the archers.

The Macedonian arrows continue their success. Desperate, Pyrrhus orders his cavalry to charge the enemy's counterpart. There is a brutal melee that leaves both sides blown

Pyrrhus's pikes find themselves alone. They retreat from the field.

Battle of Ambracia
Pyrrhus retires to his home country while Antigonus pursues. Pyrrhus makes a stand at his capital, Ambracia. As Antigonus prepares for a siege, Pyrrhus sallies out to challenge the Macedonians.
  • Pyrrhus (red) fields elephants (ferocious armored), pikes (armored), and elite cavalry with spears and archers in reserve.
  • Antigonus has archers, pikes (armored), and elite cavalry with 3 spears in reserve.

Pyrrhus drives off the enemy cavalry while his elephants stomp the archers.

The elephants continue their rampage, this time taking out some spearmen.

Pyrrhus then wipes out more spearmen. His cavalry is spent. The elephants then rout more spearmen.

Antigonus abandons the field.

Battle of Telikos
This time Pyrrhus pursues. Outside of the (fictional) town of Telikos, Antigonus confronts Pyrrhus.

Same order of battle as previously.
  • Pyrrhus (red) fields elephants (ferocious armored), pikes (armored), and elite cavalry with spears and archers in reserve.
  • Antigonus has archers, pikes (armored), and elite cavalry with 3 spears in reserve.

Again, Pyrrhus's elephants scatter the archers. But Pyrrhus's cavalry charge fails and his horsemen rout.

The archers try to stop the Macedonian cavalry. They fail.

The cavalry then overruns some spearmen. On the other flank, more spearmen sacrifice themselves to take out the elephants.

Aftermath
Because his army has suffered many casualties, Antigonus lets Pyrrhus retreat into Epirus.

Later, delegates negotiate a truce between the two kingdoms. But Pyrrhus's eye begins looking for new lands to conquer (try to at least). When will he ever learn?

Thursday, May 22, 2025

Battle of the Ionian Sea

Once again I turn to the campaigns of Pyrrhus using the Dominion series. This time on the high seas.

I used the ancient galley variant that Mark Cordone posted on the Portable Wargame Facebook group.

Background
After his defeat in Sicily, Pyrrhus embarks what remains of his army and sails back to Epirus. On the way, his fleet gets ambushed by the Macedonian navy of Antigonus Gonatas.

Set Up
I used my generic ship squadrons for this game. There are 4 types of counters - large ships (3 ships in wedge formation), medium (4 ships), small (6 ships), and transports (3 in line).
  • The large ships naturally represent Large ships. Pyrrhus is the only one with Large ships, and they are rated as Marines (rely on boarding actions).
  • Antigonus's medium ships are Missiles while Pyrrhus's are Rams.
  • Antigonus's small ships are Ambushers while Pyrrhus's are Missiles.
Antigonus (red, top) is the attacker while Pyrrhus (green) defends.

The Battle
The Macedonian attack on the right fails. Pyrrhus, with the flagship in the center, orders a bold attack. The squadron passes through heavy missile fire, boards, and defeats the enemy squadron.

Then repeats the feat on the Macedonian reserve.

The Macedonians on the right finally break their opponent.

But get overwhelmed by Pyrrhus's reinforcement. Meanwhile, the center squadron continues to run amok.

It breaks through in the center and flanks the Macedonians on the right.

A decisive victory for Pyrrhus.

But his ire is up. He must punish this perfidious action by the King of Macedon.

"Prepare for war!" he commands his troops.
In other words, get ready for some more Pyrrhus land battles.

Game Notes
The rules worked fine; it seems like a great way to get some galley fleets in action.
My main issue will be denoting the different ship types - missile vs. ram vs. boarding. In this battle, I tried to keep each navy relatively consistent, which seemed to work fine. I'm not sure what I'll do for mixed navies.

My Naval Box
Back in December, I consolidated all my gaming materials from a bunch of small boxes into 2 large boxes. Now I'm going back the other way. Previously I put my Dominion game pieces into its own small box.

I now did the same with my Dominion naval set. I'm re-using a box from MicroBattle.

One reason I consolidated was that I could fit a bigger board in the bigger box. With Dominion, that is no longer an issue.

The other issue with de-consolidation is that I need to duplicate some supplies. I found a couple of dice but I need to get some new markers. I have some sunken ship markers to denote defeated squadrons, but they don't stand out well. I plan to make some more white flag markers. I also need markers to indicate crack troops. I could also use markers to indicate missiles, rams, or boarders. Anyway, keep an eye out for progress.

Thursday, May 15, 2025

Battles of the British Isles - Part 1

Using 36 Ancient Battles for Dominion of the Spear

Continuing with 36 Ancient Battles for Dominion of the Spear. However, I decided to play them in themes, rather than strictly chronological. Now we have the first three of five battles located in the British Isles.

Summary
Here are the most recent battles I played and the results (showing units remaining at game end). Brief accounts below.
  • Badon Hill (517) - Saxons 3, Britons 1
  • Nechtansmere (685) - Picts 4, Northumbria 1
  • Brunanburh (937) - Anglo Saxons 4, Scots 1

Badon Hill
For these, I did not want to pull out my counters. Instead, I did them on paper and then transcribed them to the computer.
  • Sword = elite, shield = armored, and skull = ferocious
After both slides lost a unit of spearmen, the cream of each army met. Arthur and his knights (red center) faced off against the Saxon leader and his hearth guard. The Saxons remained steady and drove off Arthur.

Later the hearth guard flanked and routed the British spears, ending the battle.

Nechtansmere (685)
The Northumbrians (red) face off against the Picts.

The Pict spears ambushed the enemy (treated as ferocious), wiping out 3 of their enemy counterparts, including the Royal Bodyguard. This left Northumbria with some archers and militia.

The Picts spears on the left charged through a hail of arrows and routed the archers for the victory.

Brunanburh (937)
This time Scots (red) vs. Aethelstan's Anglo Saxons.

In the initial attack, the Scots lost their archers and Norse-Irish allies.

Then, the flanks battled. On the right, the Highlanders and Saxon fyrd battle to the death. Then the fyrd on the left overruns the Scottish spears. Oops. The spears on the left should not be ferocious. I think I played it right but transcribed it incorrectly.

An easy victory for Aethelstan.

Tuesday, May 13, 2025

Battles of the Roman Empire

Using 36 Ancient Battles for Dominion of the Spear

Recently, Shaun from Shaun's Wargaming started posting the scenarios from 36 Ancient Battles for Dominion of the Spear. I started them a few months ago so I decided to get back into it.

I left off after completing the battles of the Roman Republic.

Summary
Here are the most recent battles I played and the results (showing units remaining at game end). Brief accounts below.
  • Edessa (260 AD) - Sassanid Persians 2, Romans 1
  • Immae (272 AD) - Romans 3, Palmyrans 1
  • Adrianople (378 AD) - Romans 5, Visigoths 1
  • Chalons (451 AD) - Huns 4, Romans 1

Interesting, the first two battles had historical results then the next two did not. 

I actually played these battles twice. I lost my records for the first time but I remember that the Romans went 0-4. They did better this time.

Edessa
A close and bloody fight vs. the Persians. Midway through the battle, the Persian elephants and Roman legionaries fought to a stalemate. Meanwhile, the horse archers on the left destroyed the Roman auxiliaries.

After this, the Roman cavalry reserve advanced in the center, but the horse archers hit their left flank, routing them.

Immae
Prior to this picture, the Romans sacrificed their cavalry on the right to destroy the Persian cataphracts.

Then their left wing cavalry likewise neutralized the cataphracts. This allowed the spears to mop up the field.

The legionaries in reserve never even broke a sweat.

Adrianople
Before this picture, the Roman right wing cavalry drove off the Goth cavalry. Then the cavalry and archers routed the enemy warriors.

Chalons
The Roman's allied cavalry did not fare well. This left the legionaries and archers unsupported.

When the archers moved into the battle line, the Huns flanked them and wiped them out.

Saturday, May 3, 2025

Pyrrhus's Last Chance

Part 3 of a Dominion of the Spear Campaign

Following up from the last post.

Background
Pyrrhus lost his first battle against the Carthaginians outside Syracuse. The Carthaginians pursued and Pyrrhus made a stand. This time, he won a decisive victory.

Now he advances along the north coast of Sicily. The Carthaginians block his way outside the city of Panormus.

Battle of Panormus
The army compositions are unchanged.
  • Pyrrhus (blue) - Elephants (ferocious armored), archers, elite cavalry, armored pikes, spears
  • Carthaginians (red) - 2 armored spears, 1 chariots (elite armored), 2 spears (representing javelins)
Pyrrhus initiates the attacks with his elephants, but they are stymied by the hill. They rout from the field.

Note: I added the hill for variety. It provided a defense bonus if the occupying unit did not already have one. In the above case, it was superfluous. I still used it in the narrative just because.

Then Pyrrhus leads his cavalry in a charge that destroys the enemy chariots.

Pyrrhus's archers drive the spears from the hill. But his cavalry breaks against the javelin men.

Pyrrhus's spears drive off the javelin men. But the archers in turn get routed.

The remaining Carthaginian javelin men flank Pyrrhus's pikes. The attack proves too much and the pikes flee.

A Carthaginian victory!

Aftermath
His army decimated, Pyrrhus returns to Messana, boards his ships, and sails back to Epirus. His foreign adventures have proven disastrous.

What's Next?
Let's see if Pyrrhus can hold onto his throne. Given my luck with him, I doubt it.

Thursday, May 1, 2025

Pyrrhus vs. Carthage

Part 1 of a Dominion of the Spear Campaign

I decided to play a 3 game campaign pitting Pyrrhus vs the Carthaginians in Sicily.

Background
When last we left Pyrrhus, the Romans had defeated him. He decided to try his luck in Sicily.
He arrives as the Carthaginians besiege Syracuse. Pyrrhus goes to the aid of the city.

Battle of Syracuse
  • Pyrrhus (blue) - Elephants (ferocious armored), archers, elite cavalry, armored pikes, spears
            Note: I accidentally used an elite marker rather than armored for the pikes.
  • Carthaginians (red) - 2 armored spears, 1 chariots (elite armored), 2 spears (representing javelins)
Note: I bumped the armies up to 14 points.

Pyrrhus attacks the Carthaginians encamped by the walls of the city. 
Note: The walls are just for looks. They have no impact on play.

Pyrrhus's elephants rout the Carthaginian spears. But the Carthaginian heavy chariots run roughshod over Pyrrhus and his cavalry.
Note: I did not bother with leaders this time out. I assumed that Pyrrhus escaped the rout with his life.

The Libyan javelinmen fill the gap on the left and stop the elephants cold. Meanwhile, the Greek pikes stop the chariots, but they are also hors de combat.

More javelin men move into the line. They flank and rout Pyrrhus's archers.

Pyrrhus retreats back to his base at Messana.

Battle of Messana
The Carthaginians pursue. Pyrrhus reforms his army and makes a stand
  • I used the same army lists as the first battle.
The Carthaginians attack with their chariots, but Pyrrhus and his cavalry hold them back. Meanwhile, Pyrrhus's elephants rout the enemy spearmen.

The Pyrrhus put the chariots to flight.

The elephants continue their rampage. To salvage the situation, the Carthaginian general presses his spears in the center. A hail of arrows rains down on them, obliterating their formations.

The Carthaginians retreat. A decisive victory for Pyrrhus!

Tune in next time for the thrilling conclusion!

Tuesday, April 29, 2025

Romans vs. Persians

Inspired by a post* on the Portable Wargame Facebook group, I looked into playing a Byzantine battle with Dominion of the Spear. I settled on Late Romans vs. Sassanid Persians.

* Bob Cordery provides a nice overview of the post on his blog.

Set Up
  • Persians (blue) - Elephants (elite armored), 2 armored horse archers in battle line. Spears in reserve
  • Romans (red) - cavalry, archers, and legionaries (elite armored) in battle line. Cavalry and spears in reserve.
The Battle
The Persians launch their elephants on the left. The Roman cavalry panics and bolts. The Roman legionaries try unsuccessfully to engage the horse archers.

But the legionaries finally draw the horse archers into melee. The horse archers don't last.

The legionaries continue their attacks, this time routing the reserve spears. On the left, the Roman spears and Persian elephants engage in a bloody stalemate. leaving both units blown.

On the Persian side, only a unit of horse archers remain. Seeing both flanks exposed, they wisely decide to withdraw from the battlefield.

A Roman victory!

Next
Dominion is great! It is so easy to set up and play.
As a result, I've been playing a lot of games and have lots of reports to share. Over the next couple of weeks (and hopefully longer) you'll get 3 reports a week (on Tuesday, Thursday, and Saturday). I even completed a couple of 3-game campaigns!

Saturday, March 8, 2025

Pyrrhus in Italy (Dominion Style)

I was getting a little tired of the 36 battles so I decided to do something different with Dominion of the Spear (DotS). I previously ran a Pyrrhus in Italy campaign using MicroBattle. Let's see how he does with DotS.

Notes:
  • I used the Epirus Pyrrhus and Tullian Roman lists as the basis for the armies but added allied spears to both for 14 point armies. Otherwise, Pyrrhus was a little thin.
    • I used the Tullians because the Polybian list has elite legions. I'm not sure that quite applies to Rome yet.
  • I used the terrain generation rules from the 3 x 3 Portable Wargame. I haven't totally figured out how terrain will affect the battles. For Heraclea, I rolled a river but I ignored it. Then I rolled no terrain for the second battle. So it was a moot point.
Heraclea
King Pyrrhus lands in Italy and advances to Heraclea to confront a Roman army threatening the Greek colonies.

Here are the initial dispositions.
  • Rome (red) - armored legions on flanks with new recruits in center. Javelins (using LI counter but counts as Melee Infantry), cavalry, and Italian allied spears in reserve.
  • Pyrrhus - From L to R, elephants, archers, and Pyrrhus with his elite cavalry. Phalanx and Greek allies in reserve

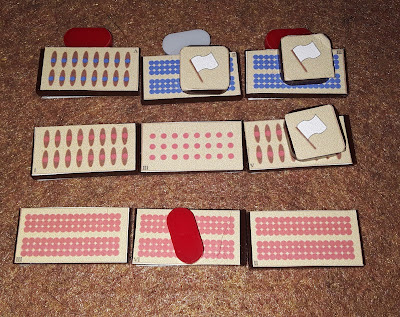
The new legionaries charge Pyrrhus's archers and wipe them out. Meanwhile, there is a brutal melee between Pyrrhus's elephants and one of the veteran legions. In the end, both are rendered hors de combat.

Pyrrhus leads his cavalry against the veteran legion (R). HIs charge breaks the legion, but his cavalry is blown. Meanwhile, the Greek allies hold off a charge by the Roman cavalry.

Pyrrhus sends his phalanx against the Roman recruits in the center. Pyrrhus is confident. But the recruits put up stiff resistance. They finally break, but the phalanx is spent.

Pyrrhus realizes that he cannot win the day. He calls retreat.
Note that I did not eliminate Pyrrhus even though his unit was destroyed. I'd like to think that he would at least stick around for the rest of the battle. The counter is just there for window dressing, however.

The Pyrrhic army withdraw back towards the Greek city-state of Tarentum.

Tarentum
The Romans pursue Pyrrhus back to Tarentum. Just outside the city, Pyrrhus makes a stand.
Same army compositions as Heraclea. I made a roll to see if either side lost points but both passed.

This time Pyrrhus puts his phalanx in the front. The battle starts off well when Pyrrhus leads his cavalry in a charge that rides over a legion. But his elephants fare poorly against the armored legion on the other flank.

Pyrrhus's archers fill in the gap left by the elephants. The legion blocks the archers' hail of arrows on its shields. Then the legion charges and routs the archers.

But the charge leaves the legion disordered. Pyrrhus's Greek allies pounce, and drive off the legion. On the right, their is a brutal cavalry scrum, knocking both sides out of the action.

Pyrrhus is wounded in the fray so he retires from the field.
I rolled to see what would happen to Pyrrhus. I rolled a 1, which I would normally interpret as death. But he's the star of the show. Instead, I decided he was gravely wounded and could not remain with the army. That's why you don't see his counter in the next picture.

His infantry holds out. But the Roman javelins (R) come up to the phalanx's flank and pepper it. This forces the phalanx to retire.

Pyrrhus's army retreats into Tarentum. The Tarentines, however, have little interest in sustaining a siege. Faced with the city elders' grumblings, Pyrrhus decides to leave the Greek colonists to their fate. He packs his army into his fleet and sails away.

Finis

Campaign Notes
I chose to repeat Pyrrhus's adventures in Italy, a campaign I originally completed using my MicroBattle rules. Using DotS, I was able to complete the campaign in one morning.

I had planned to play Pyrrhus's Sicily campaign using MicroBattle, but put that on hold after discovering DotS. Now I think I will run the Sicily campaign using DotS.