Showing posts with label 3x3. Show all posts

Saturday, May 10, 2025

Hassan vs. Harald

A Viking in the Sun campaign game

I'm completing my Viking in the Sun campaign. This time, I'm using Dominion rules on a 3 by 3 grid.

Previously
This campaign follows the exploits of Harald Hardrada in the Holy Land. He has led his force in two battles.
  1. The bandit Hassan ambushed Harald's force, stopping him from escorting a Byzantine ambassador to his destination.
  2. Then Harald ousted Hassan from a local shrine.
Set Up
Harald tracks Hassan's bandits to a box canyon. But Hassan is waiting on the cliffs, ready to attack.

Forces:
  • Harald has his Varangians (elite), spears, archers, cavalry, and knights (armored). Harald is with the Varangians.
  • Hassan has 2 horse archers, 1 cavalry, 2 archers, and a unit of spears. Hassan is with the spears.
Each leader wants to kill his opposite number (rout his unit).

The Battle
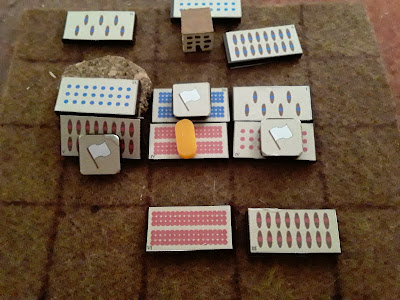
Harald (red) advances his forces. Hassan's horse archers on the right advance and engage the knights. The knights ride through the storm of arrows and rout the horse.

Then Harald's archers rout the horse archers on the left.

Harald's Varangians engage the cavalry on the hill. The cavalry routs.

Hassan can no longer skulk in the rear. His spears contest Harald's Varangians. But it is an unequal contest. The Varangians rout the spears.

Harald catches up with Hassan and kills him.

Aftermath
By killing Hassan and scattering the bandits, Harald helps bring a semblance of peace to the Holy Land (and wins the campaign!). Now his Byzantine overlords plan an invasion of Sicily. Harald prepares for his next adventure!

WHAT'S NEXT
Vikings in the Sun has two more mini campaigns. Before I get to those, however, I'm going back to Dominion
  • First, I played some scenarios from the Dominion of the Spear supplement. 
  • Then Dominion of Frederick the Great came out. I felt compelled to purchase it and to try it out. 
Stay tuned!

Thursday, May 8, 2025

A Viking in the Sun - Part 1

On my old blog, I started a Viking in the Sun campaign, but never got far with it. I decided to rectify the situation using a mix of Dominion and 3x3 rules. I used a 3x3 grid but for the most part used Dominion of the Spear combat rules.

Ambush
Harald Hardrada leads a (red) force escorting a Byzantine ambassador. He gets waylaid by bandits.
  • Harald has a company of elite Varangians (gold marker), heavy infantry, 2 squadrons of knights, and some archers. Probably should have made the knights armored. Oh well.
  • The bandits have 2 bands of horse archers, 1 of cavalry, 2 archers, and some spears,
Harald must clear a path to the town before him. 
  • The town is off the board in the bandit reserve area. 
  • Because my mat is only 4 squares deep, Harald's reserve area is off the mat.
The bandit leader Hassan springs his ambush.

Harald destroys the spears in front of him but his flanks fall to hails of arrows.

Then bandit archers rout the Varangians. Harald must retreat with the ambassador.
  • I assumed that the ambassador was with Harald and the Varangians. The loss of the Varangians meant game over.
  • I gave units a chance to retreat instead of getting destroyed but Harald's losses kept failing the roll.

Disputed Shrine
Licking his wounds, Harald is spoiling for an opportunity to pay back the bandit leader Hassan. Harald learns that Hassan has seized a local shrine and is forcing pilgrims to pay an entry tax. Harald leaps into action.

I kind of messed this one up. I thought the bandit's back row was the reserve area, but it was really part of the board. This meant that the bandit troops weren't in the best formation. Ah, fog of war.

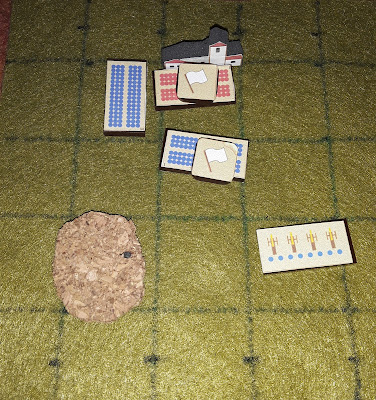
Harald crests a hill and sees the shrine below him.

Bandit archery takes out some of Harald's knights.

Harald attacks the shrine and routs the spearmen holding it. Meanwhile, knights from Harald's reserve wipe out the enemy archers.

Then the knights overrun more archers.

Looks like I'm missing a photo.

After the knights and bandit cavalry fight to a standstill, Harald's Varangians sally against some horse archers. The horse rout, leaving Harald in command of the shrine.

Aftermath
Harald has evened the score. Both leaders prepare for the climatic finale.

Stay tuned to find out what happens next!

Tuesday, May 6, 2025

Battle of Spielstadt

A 3x3ish Experiment
As much as I love the Dominion series, sometimes I want a little more. Specifically, I want more variety of scenarios. Dominion essentially has one scenario - a pitched battle.

I'm toying with the idea of adapting One Hour Wargame scenarios to Dominion. I noticed that OHW scenario maps are on a 3x3 grid. Why not try a 3x3-style game? I created a 5x5 grid (to include reserve and flank areas). I winged it with the rules; they are a mishmash of Dominion, the Portable Wargame, and MicroBattle.

Background
The kingdoms of Redgrave and Bluderia are once again at war.
Note: These kingdoms are from imagi-nations I created a couple of decades ago. They participated in a number of campaigns on my old blog.

Bluderia's Marshal Heinrich von Sturmwald outmaneuvers the Redgravians. He descends upon the lightly defended town of Spielstadt, held by General Wilhelm von Falkenstein.
Note: This is scenario 21 - Twin Objectives from OHW.

Set Up
Falkenstein (red army) has 2 infantry brigades and a cavalry brigade guarding the town of Spielstadt. In addition, a brigade of light infantry defends a wooded hill.

Sturmwald's vanguard consists of a brigade each of infantry and cavalry. He has 3 more infantry brigades and an artillery regiment in reserve.

The Battle
The Bluderian vanguard advances. The Redgravian defenders sally out and attack. The Bluderian cavalry (right) forces its counterpart to retreat. In the center, the infantry brigades grind each other down. On the left, the Bluderian infantry and Redgravian lights fight to a stalemate.

Notes: 
  • I adapted a retreat rule, like the Portable Wargame. Otherwise, the unit is eliminated.
  • When a vacancy opened on an army's baseline, I moved a unit onto the battlefield from the reserve area.
The Bluderian cavalry pursue but a counterattack routs them.

Bluderia's artillery forces the enemy cavalry to retreat again. Redgrave's lights also get destroyed.

Another fight for the town. Bluderia loses a brigade while Redgrave temporarily retreats.

Finally, the guns destroy the cavalry. Bluderia's infantry brigades close in on the town.

A bloody assault wipes out the defenders. Bluderia can take the town.

Victory for Bluderia!

NOTES
  • Game time was about 12 minutes. Not as fast as Dominion but not bad.
  • The OHW scenario has a 15 turn time limit. Given that this is a quick-play scenario, I should have reduced the number of turns. I just did not know by how much so I played the game out to its conclusion. It went 6 turns. Perhaps I should have had a 5 turn limit?
  • Instead of automatic defeat when down to 1 unit, I rolled morale to see if Redgrave's last defenders would keep fighting. They did, but could not hold out.
  • The units are out-of-scale on the map compared to OHW. Each square would equate to 12" on a OHW board, but OHW units should be 4"-6" wide. I briefly thought about halving the size of the units, but I don't want to put in the effort. Besides, I think it worked fine to have units in the reserve area.