Wednesday, May 28, 2025

Battle of Nolustee

Last year on my old blog, I decided to start an American Civil War campaign in commemoration of Memorial Day. I chose to model my campaign on the 1864 North Florida campaign.

This year, I decided to restart the campaign, this time using Dominion of the Spear and Bayonet for rules.

Background
The Union holds the Florida port city of Jacksonville. However, the rebels use interior roads to supply the army with beef.
Historical note: Once Vicksburg fell, cutting off supplies from Texas, Florida became the primary beef supplier of the Confederate army.

The Union decides to launch an expedition from Jacksonville to take Lake City. This will cut off the rebel's supply of beef.

A Confederate army marches to counter the expedition. It meets the Union forces near the little (fictional) town of Nolustee.

The Forces
The Union commander, General Truman Seymour, has the following forces:
  • 4 infantry brigades (Barton, Hawley, Chuzzlewit, and Montgomery)
    • Rated as line infantry
    • Montgomery's African American troops, including the 54th Mass., are elite.
    • Chuzzlewit's brigade is fictional. All others are historical.
  • 1 cavalry brigade (Henry) - rated as Skirmishers
  • 1 artillery detachment (Hamilton)
General Finegan commands the Confederates. I'm not naming the brigade commanders. Finegan commands:
  • 3 infantry brigades (Line)
  • 1 cavalry brigade (Skirmishers)
  • 2 artillery detachments
Note that the cavalry units are rated as skirmishers. I assume they operate as mounted infantry.

Set Up
  • Finegan (top): Artillery in woods (fortified), line, mounted skirmishers, with artillery and line in reserve
  • Seymour: Montgomery, Hawley, Henry' mounted skirmishers, with Barton, artillery, and Chuzzlewit in reserve.

The Battle
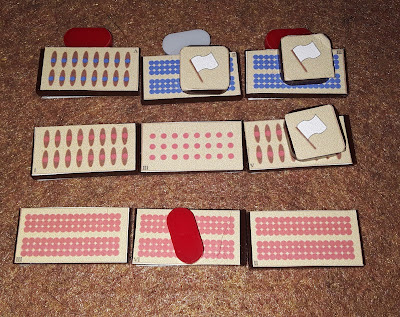
Montgomery's brigade unleashes a volley that sweeps through the rebel artillery, sending the artillerists running.

The cavalry brigades wipe each other out.

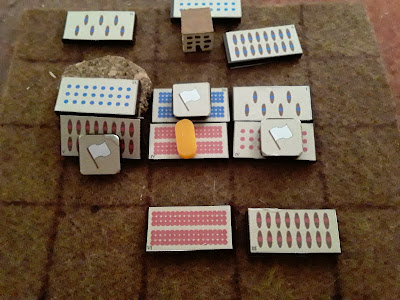
Seymour brings up his artillery. It flails the rebel's reserve infantry. Things are looking good for Seymour.

But the rebel infantry routs Hawley's brigade.

And Chuzzlewit's brigade.

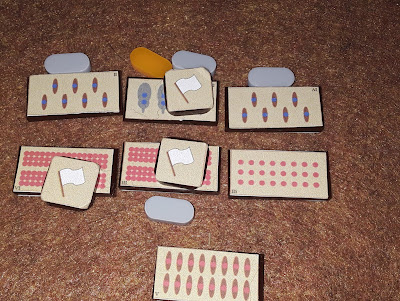
Montgomery's brigade falls to the reserve artillery. Now Seymour is staring at a possible defeat!

The rebel artillery blasts Barton's brigade. They flee, leaving the field in Confederate hands.

Aftermath
Seymour must retreat back to Jacksonville, with the rebels nipping at his heels. Finegan sees an opportunity to liberate Jacksonville from the Federal troops.

Stay tuned for chapter 2 around next Memorial Day!

Monday, May 26, 2025

We Honor the Fallen

May God bless those who sacrificed their lives for our country.


"There is no greater love than to lay down one’s life for one’s friends." John 15:13 (NLT)

Saturday, May 24, 2025

Battles of the Byzantines

Using 36 Ancient Battles for Dominion of the Spear

More Dominium ancient battles. Our theme this time is Byzantines.

Summary
Here are the results of the Byzantine battles. Numbers represent remaining units at the end of the battle. Brief battle reports are below.
  • Dara (530) - Sassanid Persians 2, Byzantines 1
  • Taginae (552) - Byzantines 3, Ostrogoths 1
  • Yarmouk (636) - Arabs 2, Byzantines 1
  • Manzikert (1071) - Seljuk Turks 4, Byzantines 1
Some close battles but not much luck for the Byzantines.

Dara
The elite cavalry wipe each other out.

Both sides slowly whittle the others down. The Byzantine archers clear the center but the Sassanid spearmen rout the cavalry (right).

The spears then flank and assault the archers, winning the day for the Persians.

Taginae
The Ostrogoth's fierce cavalry smash the front line. It looks like it's going to be another bad day for the Empire.

But Byzantine missiles strike down the enemy cavalry.

The Byzantine archers then flank the Ostrogoth reserve spears, sending them in flight. General Narses pulls a victory from seeming defeat!

Yarmouk
The lines clash. Great quantities of blood are spilled. Note: I don't know if I ever had 4 units lost in 1 turn!

While the cavalry (left) wipe each other out, the Arab's fanatical spears rout their Byzantine counterparts.

The Arab spears then smash the Byzantine reserve for the victory.

Manzikert
The Turkish horse archers on the left slowly wear down the Byzantines, draining their reserve,

Then the battle comes down to this - elite cavalry for both sides. The Turks prevail.

Thursday, May 22, 2025

Battle of the Ionian Sea

Once again I turn to the campaigns of Pyrrhus using the Dominion series. This time on the high seas.

I used the ancient galley variant that Mark Cordone posted on the Portable Wargame Facebook group.

Background
After his defeat in Sicily, Pyrrhus embarks what remains of his army and sails back to Epirus. On the way, his fleet gets ambushed by the Macedonian navy of Antigonus Gonatas.

Set Up
I used my generic ship squadrons for this game. There are 4 types of counters - large ships (3 ships in wedge formation), medium (4 ships), small (6 ships), and transports (3 in line).
  • The large ships naturally represent Large ships. Pyrrhus is the only one with Large ships, and they are rated as Marines (rely on boarding actions).
  • Antigonus's medium ships are Missiles while Pyrrhus's are Rams.
  • Antigonus's small ships are Ambushers while Pyrrhus's are Missiles.
Antigonus (red, top) is the attacker while Pyrrhus (green) defends.

The Battle
The Macedonian attack on the right fails. Pyrrhus, with the flagship in the center, orders a bold attack. The squadron passes through heavy missile fire, boards, and defeats the enemy squadron.

Then repeats the feat on the Macedonian reserve.

The Macedonians on the right finally break their opponent.

But get overwhelmed by Pyrrhus's reinforcement. Meanwhile, the center squadron continues to run amok.

It breaks through in the center and flanks the Macedonians on the right.

A decisive victory for Pyrrhus.

But his ire is up. He must punish this perfidious action by the King of Macedon.

"Prepare for war!" he commands his troops.
In other words, get ready for some more Pyrrhus land battles.

Game Notes
The rules worked fine; it seems like a great way to get some galley fleets in action.
My main issue will be denoting the different ship types - missile vs. ram vs. boarding. In this battle, I tried to keep each navy relatively consistent, which seemed to work fine. I'm not sure what I'll do for mixed navies.

My Naval Box
Back in December, I consolidated all my gaming materials from a bunch of small boxes into 2 large boxes. Now I'm going back the other way. Previously I put my Dominion game pieces into its own small box.

I now did the same with my Dominion naval set. I'm re-using a box from MicroBattle.

One reason I consolidated was that I could fit a bigger board in the bigger box. With Dominion, that is no longer an issue.

The other issue with de-consolidation is that I need to duplicate some supplies. I found a couple of dice but I need to get some new markers. I have some sunken ship markers to denote defeated squadrons, but they don't stand out well. I plan to make some more white flag markers. I also need markers to indicate crack troops. I could also use markers to indicate missiles, rams, or boarders. Anyway, keep an eye out for progress.

Tuesday, May 20, 2025

The First Silesian War

A Dominion of Frederick the Great Mini-Campaign

A couple of weeks ago I picked up the new titles in the Dominion series.
I decided to try out Frederick with a mini-campaign, using scenarios from the book.

Mollwitz
King Frederick of Prussia takes advantage of the Austrian succession crisis by invading the Imperial territory of Silesia. Field Marshal Neipperg leads the defense.

King Frederick the Cat
A Chat GPT pic based on a photo of my cat Fred

Frederick's artillery bombards the Austrian infantry to no effect. The infantry charges and overruns the guns.

Frederick brings up his infantry, which rout the Austrians. But the Austrian cavalry on the right overwhelm their counterparts.

A concerted attack on the left and center decimates the Austrians.

But the Austrian cavalry continues its success.

Before the Austrian cavalry could follow up its success, the Prussians hit the Austrian infantry's flank.

The battle was close - the Prussians were also near defeat. But they emerge victorious.

Chotusitz
This time, Prince Charles of Lorraine leads an army against Frederick. But Frederick takes the initiative and attacks.

The Prussian cavalry on the right kick off the battle. The Austrians rout them.

Fredericks elite infantry advance and drive off the Austrian cavalry. Meanwhile, the infantry in the center battle to a bloody stalemate, with both sides rendered ineffective for the rest of the battle.

At this point, Prince Charles feels confident. His army outnumbers Fredericks. Then disaster strikes as his flanks collapses.

Another narrow victory for Frederick!

Aftermath
After these defeats, the Empress Maria Theresa has no choice but to cede Silesia to Frederick.

Monday, May 19, 2025

Some Random Thoughts

If Only
While perusing some battle reports on my old blog, I began thinking about my miniatures history. I kept leaping about among multiple periods and scales. I counted at least 20 abandoned projects on my old blog. It made me wish I had settled on counters ages ago. It would have saved a lot of work.

Marker Musings
I'm debating with myself if I should revise my markers. Right now, I have pill-shaped gold, red, and silver markers to represent elite, ferocious, and armored units. Initially, I put the markers behind the units. Lately, I put the markers on the units.

The idea is that the markers could represent flags. Now I wonder if I should get markers that look more like flags. The easiest would be to switch to rectangular markers. Another idea I had was to sit them on the side, but I don't think they'd be stable enough.

Anyway, just something I'm pondering.

Dungeon Crawling
Played a little Pathfinder last week, It has me hankering for some dungeon crawling. I need to work up the monster cards for my micro dungeon rules.

Dominion Reference
I spent some time this weekend organizing my Dominion files on my tablet. I had every single title downloaded, which was taking up a bit of space. To streamline things, I created my own reference document with the quick reference sheets for all eras. I debated adding the army lists. At first, I was just going to add some representative armies, but I could not decide which ones. I eventually added them all. It is still smaller than the separate files, and they're now all in one document.

Dominion Naval
I was toying with ideas to use Dominion for galley battles. Well, Mark Cordone beat me to it. Over at the Portable Wargame Facebook group, he posted galley rules. I'll have to try them out while I'm on vacation.

Saturday, May 17, 2025

Battles of the British Isles - Part 2

Using 36 Ancient Battles for Dominion of the Spear

I have 2 more British battles to report. Again, I used my virtual board.

Summary
Here are the battles. Details below.
  • Hastings - Normans 5, Anglo-Saxons 1
  • Bannockburn - English 4, Scots 1
Hastings
Duke of William of Normandy lands in England to stake his claim to the throne. His Norman forces (blue) attack Harold's troops at Hastings.

And it's a disaster for the Anglo-Saxons. The archers strike down Harold and the Breton cavalry rout the spears on the flank (R).

The Bretons continue their charge, slamming into the reserve spears. These also rout. Battle over; England falls to William.

Bannockburn
King Edward II leads an English force (red) into Scotland. Robert the Bruce's Scots confront Edward.

The English cavalry charges with devastating effect, routing two units of spears, including the Bruce.

The English cavalry on the flank continues its charge, attacking the reserve spears. Just like Hastings, the reserve routs. Edward is victorious.

Wow! Those were two ridiculously short battles!

Thursday, May 15, 2025

Battles of the British Isles - Part 1

Using 36 Ancient Battles for Dominion of the Spear

Continuing with 36 Ancient Battles for Dominion of the Spear. However, I decided to play them in themes, rather than strictly chronological. Now we have the first three of five battles located in the British Isles.

Summary
Here are the most recent battles I played and the results (showing units remaining at game end). Brief accounts below.
  • Badon Hill (517) - Saxons 3, Britons 1
  • Nechtansmere (685) - Picts 4, Northumbria 1
  • Brunanburh (937) - Anglo Saxons 4, Scots 1

Badon Hill
For these, I did not want to pull out my counters. Instead, I did them on paper and then transcribed them to the computer.
  • Sword = elite, shield = armored, and skull = ferocious
After both slides lost a unit of spearmen, the cream of each army met. Arthur and his knights (red center) faced off against the Saxon leader and his hearth guard. The Saxons remained steady and drove off Arthur.

Later the hearth guard flanked and routed the British spears, ending the battle.

Nechtansmere (685)
The Northumbrians (red) face off against the Picts.

The Pict spears ambushed the enemy (treated as ferocious), wiping out 3 of their enemy counterparts, including the Royal Bodyguard. This left Northumbria with some archers and militia.

The Picts spears on the left charged through a hail of arrows and routed the archers for the victory.

Brunanburh (937)
This time Scots (red) vs. Aethelstan's Anglo Saxons.

In the initial attack, the Scots lost their archers and Norse-Irish allies.

Then, the flanks battled. On the right, the Highlanders and Saxon fyrd battle to the death. Then the fyrd on the left overruns the Scottish spears. Oops. The spears on the left should not be ferocious. I think I played it right but transcribed it incorrectly.
An easy victory for Aethelstan.

Tuesday, May 13, 2025

Battles of the Roman Empire

Using 36 Ancient Battles for Dominion of the Spear

Recently, Shaun from Shaun's Wargaming started posting the scenarios from 36 Ancient Battles for Dominion of the Spear. I started them a few months ago so I decided to get back into it.

I left off after completing the battles of the Roman Republic.

Summary
Here are the most recent battles I played and the results (showing units remaining at game end). Brief accounts below.
  • Edessa (260 AD) - Sassanid Persians 2, Romans 1
  • Immae (272 AD) - Romans 3, Palmyrans 1
  • Adrianople (378 AD) - Romans 5, Visigoths 1
  • Chalons (451 AD) - Huns 4, Romans 1

Interesting, the first two battles had historical results then the next two did not. 

I actually played these battles twice. I lost my records for the first time but I remember that the Romans went 0-4. They did better this time.

Edessa
A close and bloody fight vs. the Persians. Midway through the battle, the Persian elephants and Roman legionaries fought to a stalemate. Meanwhile, the horse archers on the left destroyed the Roman auxiliaries.

After this, the Roman cavalry reserve advanced in the center, but the horse archers hit their left flank, routing them.

Immae
Prior to this picture, the Romans sacrificed their cavalry on the right to destroy the Persian cataphracts.

Then their left wing cavalry likewise neutralized the cataphracts. This allowed the spears to mop up the field.

The legionaries in reserve never even broke a sweat.

Adrianople
Before this picture, the Roman right wing cavalry drove off the Goth cavalry. Then the cavalry and archers routed the enemy warriors.

Chalons
The Roman's allied cavalry did not fare well. This left the legionaries and archers unsupported.

When the archers moved into the battle line, the Huns flanked them and wiped them out.

Saturday, May 10, 2025

Hassan vs. Harald

A Viking in the Sun campaign game

I'm completing my Viking in the Sun campaign. This time, I'm using Dominion rules on a 3 by 3 grid.

Previously
This campaign follows the exploits of Harald Hardrada in the Holy Land. He has led his force in two battles.
  1. The bandit Hassan ambushed Harald's force, stopping him from escorting a Byzantine ambassador to his destination.
  2. Then Harald ousted Hassan from a local shrine.
Set Up
Harald tracks Hassan's bandits to a box canyon. But Hassan is waiting on the cliffs, ready to attack.

Forces:
  • Harald has his Varangians (elite), spears, archers, cavalry, and knights (armored). Harald is with the Varangians.
  • Hassan has 2 horse archers, 1 cavalry, 2 archers, and a unit of spears. Hassan is with the spears.
Each leader wants to kill his opposite number (rout his unit).

The Battle
Harald (red) advances his forces. Hassan's horse archers on the right advance and engage the knights. The knights ride through the storm of arrows and rout the horse.

Then Harald's archers rout the horse archers on the left.

Harald's Varangians engage the cavalry on the hill. The cavalry routs.

Hassan can no longer skulk in the rear. His spears contest Harald's Varangians. But it is an unequal contest. The Varangians rout the spears.

Harald catches up with Hassan and kills him.

Aftermath
By killing Hassan and scattering the bandits, Harald helps bring a semblance of peace to the Holy Land (and wins the campaign!). Now his Byzantine overlords plan an invasion of Sicily. Harald prepares for his next adventure!

WHAT'S NEXT
Vikings in the Sun has two more mini campaigns. Before I get to those, however, I'm going back to Dominion
  • First, I played some scenarios from the Dominion of the Spear supplement. 
  • Then Dominion of Frederick the Great came out. I felt compelled to purchase it and to try it out. 
Stay tuned!

Thursday, May 8, 2025

A Viking in the Sun - Part 1

On my old blog, I started a Viking in the Sun campaign, but never got far with it. I decided to rectify the situation using a mix of Dominion and 3x3 rules. I used a 3x3 grid but for the most part used Dominion of the Spear combat rules.

Ambush
Harald Hardrada leads a (red) force escorting a Byzantine ambassador. He gets waylaid by bandits.
  • Harald has a company of elite Varangians (gold marker), heavy infantry, 2 squadrons of knights, and some archers. Probably should have made the knights armored. Oh well.
  • The bandits have 2 bands of horse archers, 1 of cavalry, 2 archers, and some spears,
Harald must clear a path to the town before him. 
  • The town is off the board in the bandit reserve area. 
  • Because my mat is only 4 squares deep, Harald's reserve area is off the mat.
The bandit leader Hassan springs his ambush.

Harald destroys the spears in front of him but his flanks fall to hails of arrows.

Then bandit archers rout the Varangians. Harald must retreat with the ambassador.
  • I assumed that the ambassador was with Harald and the Varangians. The loss of the Varangians meant game over.
  • I gave units a chance to retreat instead of getting destroyed but Harald's losses kept failing the roll.

Disputed Shrine
Licking his wounds, Harald is spoiling for an opportunity to pay back the bandit leader Hassan. Harald learns that Hassan has seized a local shrine and is forcing pilgrims to pay an entry tax. Harald leaps into action.

I kind of messed this one up. I thought the bandit's back row was the reserve area, but it was really part of the board. This meant that the bandit troops weren't in the best formation. Ah, fog of war.

Harald crests a hill and sees the shrine below him.

Bandit archery takes out some of Harald's knights.

Harald attacks the shrine and routs the spearmen holding it. Meanwhile, knights from Harald's reserve wipe out the enemy archers.

Then the knights overrun more archers.

Looks like I'm missing a photo.

After the knights and bandit cavalry fight to a standstill, Harald's Varangians sally against some horse archers. The horse rout, leaving Harald in command of the shrine.

Aftermath
Harald has evened the score. Both leaders prepare for the climatic finale.

Stay tuned to find out what happens next!